There’s something irresistible about a fruit cheesecake. With its luscious, creamy filling, buttery crust, and vibrant fruit toppings, it’s the perfect centerpiece for any occasion. Whether you’re hosting a party or simply craving a decadent dessert, this article will guide you through everything you need to know to create a flawless fruit cheesecake. From essential tools to troubleshooting common issues, this guide ensures success even for beginners. Let’s dive into the delicious world of cheesecake-making!
Understanding Fruit Cheesecake
What Is Fruit Cheesecake?
Fruit cheesecake is an indulgent dessert loved worldwide, known for its rich cream cheese filling paired with a variety of sweet, tangy fruit toppings. But how did it become such a classic? The combination of creamy textures and vibrant fruits creates an irresistible dessert that balances richness with freshness. Originating in ancient Greece and later perfected in various cultures, cheesecake has evolved into an art form, and adding fruit elevates it to a whole new level.
Origin and Popularity
Cheesecake’s roots date back thousands of years, but modern-day variations emerged in the 20th century. Fruit-topped cheesecakes gained popularity as people sought desserts that combined natural sweetness and bright visuals. Today, fruit cheesecake is a staple at celebrations, bakeries, and even casual brunches.
Why Fruit Cheesecake Stands Out
What sets fruit cheesecake apart from other desserts? It’s the perfect marriage of textures and flavors. Imagine biting into the velvety smooth filling, followed by the crisp crust and bursts of juicy fruits—it’s a symphony of taste! Moreover, the toppings can be customized to reflect the seasons or personal preferences, making it a versatile choice for any gathering.
Key Ingredients for a Perfect Fruit Cheesecake
Crust Options
The foundation of any cheesecake is its crust. Traditionally, a buttery graham cracker crust is used, but you can experiment with digestive biscuits, shortbread, or even chocolate cookies for an extra twist.
- Pro Tip: Add a pinch of cinnamon to the crust mixture for a subtle warmth that complements the fruit toppings beautifully.
Cheesecake Filling Basics
The filling is where the magic happens. Cream cheese is the star ingredient, but don’t overlook sugar, eggs, and vanilla extract. These combine to create that luscious texture we all adore. For added creaminess, many recipes include heavy cream or sour cream.
- Balance is key: Overloading the filling with sugar can overshadow the natural sweetness of the fruits. Keep it just sweet enough!
Topping Varieties
Here’s where your creativity shines! Fresh fruits like strawberries, blueberries, raspberries, and kiwi work wonderfully. You can also use fruit preserves or glazes to enhance the visual appeal and flavor.
- Fun Idea: Combine several fruits for a colorful, eye-catching design that looks as good as it tastes.
Tools and Equipment for Making Cheesecake
Essential Tools for a Flawless Fruit Cheesecake Recipe
Creating a perfect fruit cheesecake recipe doesn’t just rely on the ingredients; having the right tools can make or break the process. With the correct equipment at your disposal, you’ll not only simplify the baking process but also ensure consistent results. Let’s dive into the must-have tools!
Baking Essentials
First and foremost, you’ll need a springform pan, a vital tool for baking cheesecakes. Its removable sides allow you to release the cheesecake effortlessly without damaging the crust. Opt for a pan with a non-stick coating for easier cleanup.
Additionally, a mixer—either hand-held or stand—is indispensable for achieving a smooth filling. A few extra mixing bowls and a sturdy spatula are also helpful for preparing the crust and layering the filling.
- Did you know? Using a silicone spatula can help you scrape every bit of batter, minimizing waste.
Specialty Tools
 For an impeccable finish, an offset spatula is your best friend. It ensures your fruit cheesecake has a silky-smooth surface, making it the perfect canvas for those vibrant fruit toppings. If you’re planning to add decorative touches, a piping bag can work wonders, especially for no-bake cheesecake versions.
Another helpful tool is a kitchen thermometer. This is particularly useful for gauging the cheesecake’s internal temperature to prevent overbaking, which can lead to cracks.
Tips for Preparing Your Workspace
Before you even start baking, preparation is key. Clean and organize your tools to avoid scrambling for items halfway through the process. Set up all your ingredients, commonly referred to as mise en place—so that everything is measured and ready to go. This not only saves time but also reduces stress while you bake.
- Bonus Tip: Placing a damp towel under your mixing bowl can help stabilize it while whisking, especially if you’re using a hand mixer.
The Step-by-Step Fruit Cheesecake Recipe
How to Make the Perfect Fruit Cheesecake
Now that you’ve gathered your tools and ingredients, it’s time to roll up your sleeves and get started on this delightful dessert! By following these easy steps, you’ll create a stunning fruit cheesecake that looks as good as it tastes.
Preparing the Crust
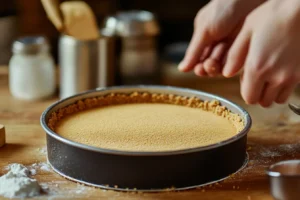
 To begin, crush the graham crackers or your chosen cookies until they resemble fine crumbs. Combine them with melted butter and a pinch of sugar, then mix thoroughly until the texture resembles wet sand. Pour the mixture into your springform pan and press it firmly into an even layer using the back of a spoon or a flat-bottomed glass.
- Pro Tip: Chill the crust in the refrigerator for at least 10 minutes before adding the filling. This step ensures the crust remains firm and doesn’t crumble when you slice the cheesecake.
Making the Cheesecake Filling
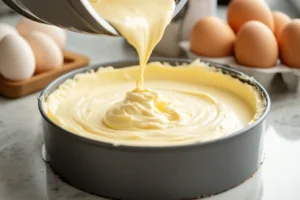
While the crust chills, focus on the star of the show—the creamy filling. Start by beating the cream cheese in your mixer until it’s velvety smooth. Gradually add the sugar, followed by the eggs, mixing after each addition to maintain a light, airy consistency. Lastly, stir in the vanilla extract and, if desired, a touch of sour cream for extra tanginess.
- Don’t overmix! Overbeating the batter can incorporate too much air, leading to cracks during baking.
Pour the prepared filling over the chilled crust, smoothing the top with an offset spatula.
Baking the Cheesecake
For the best results, preheat your oven to 325°F (163°C). Place the springform pan inside a larger baking dish, and then carefully pour hot water into the dish until it reaches halfway up the sides of the pan. This water bath helps maintain even heat, preventing cracks on the surface.
Bake for about 60–70 minutes, or until the edges are set but the center is slightly jiggly. Once baked, turn off the oven, crack the door open slightly, and let the cheesecake cool inside for 1 hour.
Assembling the Toppings
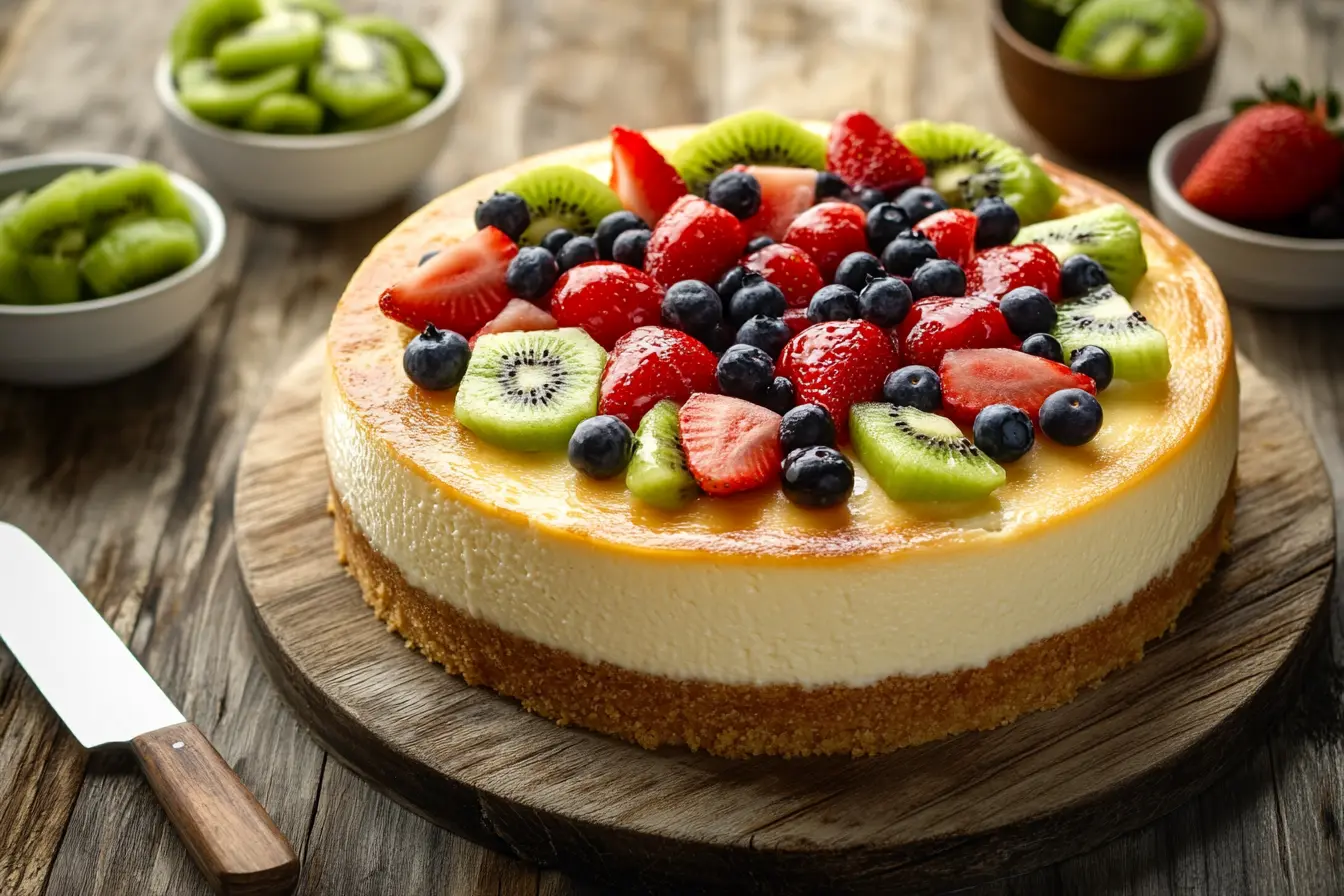
Here’s the fun part! Once your cheesecake has completely cooled and chilled in the refrigerator for at least 4 hours (or overnight), it’s ready for its fruity makeover. Arrange slices of fresh fruits—such as strawberries, kiwi, and blueberries—on top in a decorative pattern. You can also drizzle a fruit glaze or spread a thin layer of jam for added shine.
- Creative Idea: Use seasonal fruits for a vibrant and fresh twist! For example, summer berries are perfect during warmer months, while citrus fruits shine in winter.
Troubleshooting Common Issues
Even the most seasoned bakers encounter challenges when making a fruit cheesecake recipe. But don’t worry—many common issues have simple solutions! By understanding these pitfalls, you can ensure your cheesecake turns out beautifully every time.
Avoiding Cracks in Your Cheesecake
Cracks on the surface of your cheesecake can be frustrating, especially after spending so much time perfecting it. However, by taking a few precautions, you can easily prevent them.
Firstly, always mix your ingredients on a low speed. Overbeating the batter introduces excess air, which expands during baking and contracts as it cools, causing cracks. Additionally, incorporating a water bath during baking helps regulate temperature, ensuring even cooking and reducing the risk of cracks.
- Did you know? Letting your cheesecake cool gradually in the oven with the door slightly open can also prevent sudden temperature changes that cause cracking.
Fixing Common Problems
Why Cheesecake Turns Out Too Soft
If your cheesecake doesn’t set properly, it could be due to underbaking or incorrect ingredient ratios. Make sure to bake until the edges are firm and the center has a slight jiggle. Furthermore, using full-fat cream cheese and avoiding low-fat alternatives will provide the best texture.
Uneven Toppings
When it comes to adding fruit toppings, uneven placement can make your cheesecake look messy. To fix this, arrange your fruits from the center outward, creating a balanced, aesthetically pleasing design. Alternatively, you can slice fruits uniformly to ensure consistent layering.
Overbaked or Undercooked Cheesecake
Recognizing the perfect bake is crucial. An overbaked cheesecake will have a dry, crumbly texture, while an undercooked one may be too soft or runny. For the best results, keep an eye on the edges—they should be set but not brown. The center should wobble slightly like Jell-O when gently shaken.
Moreover, using a kitchen thermometer can take the guesswork out of baking. When the internal temperature reaches around 150°F (65°C), your cheesecake is perfectly baked.
- Pro Tip: If you accidentally overbake, top your cheesecake with extra fruit or a thin layer of whipped cream to add moisture and disguise any cracks.
Variations of Fruit Cheesecake
One of the best things about a fruit cheesecake recipe is its versatility. Whether you’re looking for something quick, seasonal, or dietary-friendly, there’s always a way to make it your own. Let’s explore some creative variations to take your cheesecake game to the next level!
Creative Spins on the Classic Fruit Cheesecake Recipe
No-Bake Fruit Cheesecake
For those days when you don’t feel like turning on the oven, a no-bake cheesecake is the perfect solution. This version skips the eggs and baking altogether, relying on gelatin or whipped cream to set the filling.
To make one, prepare the crust as usual, but instead of baking it, refrigerate it for about 15 minutes to firm it up. Then, whip together cream cheese, powdered sugar, and heavy cream until the mixture is smooth and fluffy. Add a touch of lemon juice for brightness, pour the filling into the crust, and let it chill for at least 6 hours. Top it with fresh fruits just before serving for a quick yet satisfying dessert.
Mini Fruit Cheesecakes
Mini cheesecakes are ideal for parties or individual servings. They’re not only adorable but also incredibly convenient to make and serve. Use a muffin tin lined with cupcake liners and press a small amount of crust mixture into each cup. Spoon the filling over the crusts, then bake or chill, depending on whether you’re making a traditional or no-bake version.
Top each mini cheesecake with a single piece of fruit, such as a strawberry slice or a few blueberries, for an elegant finishing touch. Not only are these easy to handle, but they also add a touch of sophistication to any gathering.
Seasonal Fruit Combinations
Take advantage of seasonal fruits to make your cheesecake feel fresh and exciting year-round. For instance:
- In summer, use ripe berries like strawberries, raspberries, and blueberries for a vibrant burst of color.
- During autumn, top your cheesecake with spiced apples, caramelized pears, or figs for a cozy twist.
- In winter, citrus fruits like oranges, grapefruits, and blood oranges provide a tangy, refreshing contrast to the creamy filling.
Dietary Alternatives
Gluten-Free Crust Options
If you or your guests are avoiding gluten, don’t worry—you can still enjoy a delicious fruit cheesecake. Substitute the traditional graham crackers with gluten-free cookies, almond flour, or even ground nuts. These alternatives provide a similar texture and flavor while catering to dietary needs.
Dairy-Free and Vegan Cheesecake
For a dairy-free or vegan version, swap cream cheese for plant-based alternatives like cashew cream, coconut cream, or tofu. Use coconut oil or vegan butter in the crust instead of regular butter. With these substitutions, you can create a cheesecake that’s every bit as creamy and indulgent as the original.
Whether you’re crafting mini cheesecakes, exploring no-bake options, or trying new flavors, these variations prove that cheesecake is one of the most adaptable desserts out there. Let’s move to the next section, where we’ll delve into nutritional insights and serving tips! 🍓
Nutritional Information and Serving Suggestions
Cheesecake may feel like a luxurious indulgence, but understanding its nutritional profile and how to serve it can make enjoying this dessert guilt-free and even more enjoyable. Whether you’re sharing it with loved ones or savoring a slice yourself, a few thoughtful choices can make all the difference.
Nutritional Breakdown of Fruit Cheesecake
Caloric Content
A traditional fruit cheesecake recipe typically contains around 300–400 calories per slice, depending on portion size and toppings. The calorie count can increase slightly if you use richer ingredients like full-fat cream cheese or whipped cream. However, these options contribute to the cheesecake’s signature creamy texture, making them well worth the occasional treat.
Protein, Fat, and Sugar Levels
Each slice provides a good source of protein, usually from the cream cheese and eggs, with about 5–7 grams per serving. On the other hand, the dessert is high in fat, primarily due to the cheese and butter in the crust. To balance this, you can experiment with lighter alternatives, like reduced-fat cream cheese.
When it comes to sugar, cheesecakes naturally lean toward the sweeter side. However, incorporating fresh fruits instead of sugary glazes can lower the overall sugar content while enhancing natural flavors.
- Pro Tip: Opt for a thin fruit glaze or unsweetened fruit toppings to reduce sugar without sacrificing taste.
Tips for Serving Fruit Cheesecake
Best Temperature for Serving
Cheesecake is best enjoyed chilled. After baking, allow it to cool completely in the refrigerator for at least four hours, or preferably overnight. Chilling enhances the flavor and sets the filling to the perfect consistency.
- Bonus Tip: Remove the cheesecake from the fridge about 15 minutes before serving to make slicing easier and to bring out its full flavor.
Pairing Suggestions
Pair your fruit cheesecake with beverages or side dishes that complement its richness. For example, a hot cup of herbal tea, like chamomile or mint, balances the dessert’s sweetness. Alternatively, serve it alongside fresh-cut fruits for an additional burst of color and flavor.
Storing Leftovers
If you have leftovers (lucky you!), storing them properly ensures the cheesecake stays fresh. Wrap it tightly in plastic wrap or transfer individual slices into an airtight container. Properly stored cheesecake can last in the refrigerator for up to five days. You can also freeze individual slices for up to a month—just make sure to thaw them in the fridge for several hours before eating.
- Fun Idea: Freeze a slice with extra fruit toppings for a quick and refreshing treat on a hot day.
FAQs and Final Thoughts on Fruit Cheesecake Recipe
Can I freeze a fruit cheesecake?
Absolutely! Fruit cheesecake freezes wonderfully, making it a great dessert to prepare ahead of time. Simply wrap the cheesecake (or individual slices) tightly in plastic wrap, then place it in an airtight container before freezing. When you’re ready to enjoy it, thaw the cheesecake overnight in the refrigerator. While the texture remains creamy, fresh fruit toppings might lose their vibrancy, so it’s best to add them just before serving.
What’s the best way to prevent cracks?
To avoid cracks, always use a water bath while baking. The steam keeps the temperature consistent, preventing the top from drying out or splitting. Additionally, mixing your batter gently ensures you don’t incorporate too much air, which can also lead to cracks. Finally, allow your cheesecake to cool gradually by turning off the oven and letting it sit with the door ajar.
Can I use frozen fruits for the topping?
Yes, you can use frozen fruits, but there are a few things to keep in mind. Thaw the fruits completely and drain excess liquid to prevent your cheesecake from becoming watery. Alternatively, you can cook the frozen fruits into a thick sauce to drizzle over the cheesecake. Fresh fruits, however, provide a more vibrant and appealing appearance.
How long can I store a cheesecake in the fridge?
A cheesecake stored in the refrigerator will stay fresh for up to five days. To maintain its quality, cover it tightly with plastic wrap or store it in an airtight container. If you’re storing a cheesecake with fruit toppings, try to add the fruits just before serving, as they can become soggy after a day or two.
What’s the ideal substitute for cream cheese?
If you don’t have cream cheese on hand, mascarpone is a fantastic substitute. It’s slightly milder and creamier, which can result in a richer cheesecake. For a healthier option, Greek yogurt or ricotta can also work, but the texture and flavor will differ slightly.
Can I make a vegan fruit cheesecake?
Of course! To make a vegan cheesecake, replace cream cheese with cashew cream or coconut cream, and use a plant-based butter for the crust. Instead of eggs, you can use a combination of cornstarch and almond milk, which will help the filling set. A vegan cheesecake is just as creamy and indulgent, with endless topping possibilities!

